
Diese Seite ist noch nicht übersetzt – sie wird angezeigt auf: English.
Connecting the clock to Wi-Fi
In Expert mode the clock connects to your Wi-Fi network. You give it the network name and password once, through a setup network that the clock opens itself, and the clock remembers them.
The clock works with 2.4 GHz Wi-Fi networks (IEEE 802.11 b/g/n) protected with a password. Open networks without a password, and networks that need a login page, such as hotel or guest networks, are not supported.
Setup network
| Network name | puri6- followed by the clock's serial number, for example puri6-42 (Puri 4: puri4-42) |
| Password | 123456789 |
| Setup page | http://192.168.4.1 |
Connecting step by step
-
Switch the clock to Expert mode. With no Wi-Fi saved, the clock opens the setup network straight away and the Wi-Fi LED flashes once every 2 seconds.
-
On your phone or computer, open the Wi-Fi settings and connect to the clock's setup network, for example puri6-42, with the password 123456789.
-
The setup page usually opens by itself. If it doesn't, open a browser and go to http://192.168.4.1.
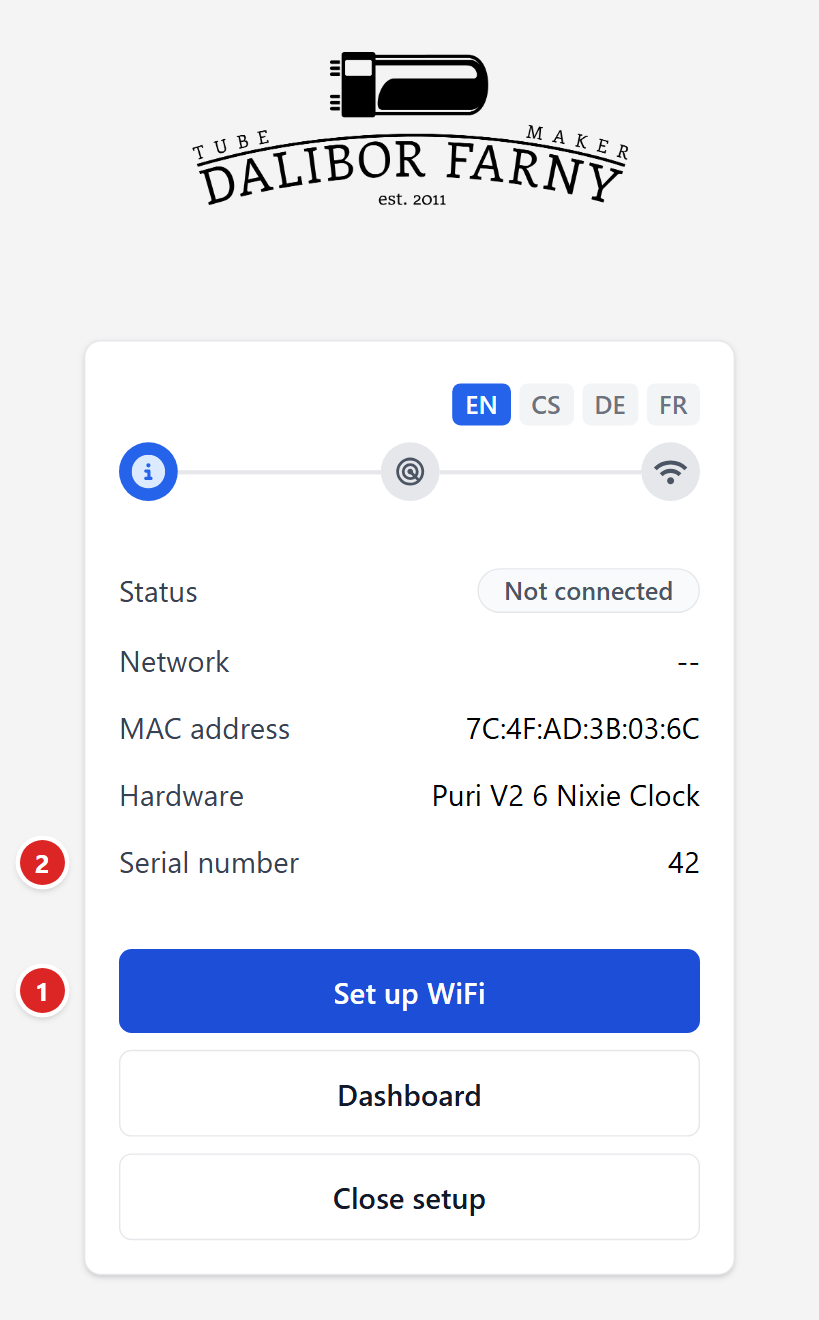
The setup page. (1) Set up WiFi starts the setup. (2) The clock's serial number – the same number as in the name of its setup network, here puri6-42. -
Tap Set up WiFi. The clock lists the Wi-Fi networks it can see.
-
Choose your network. For a hidden network, tap Skip and type its name.
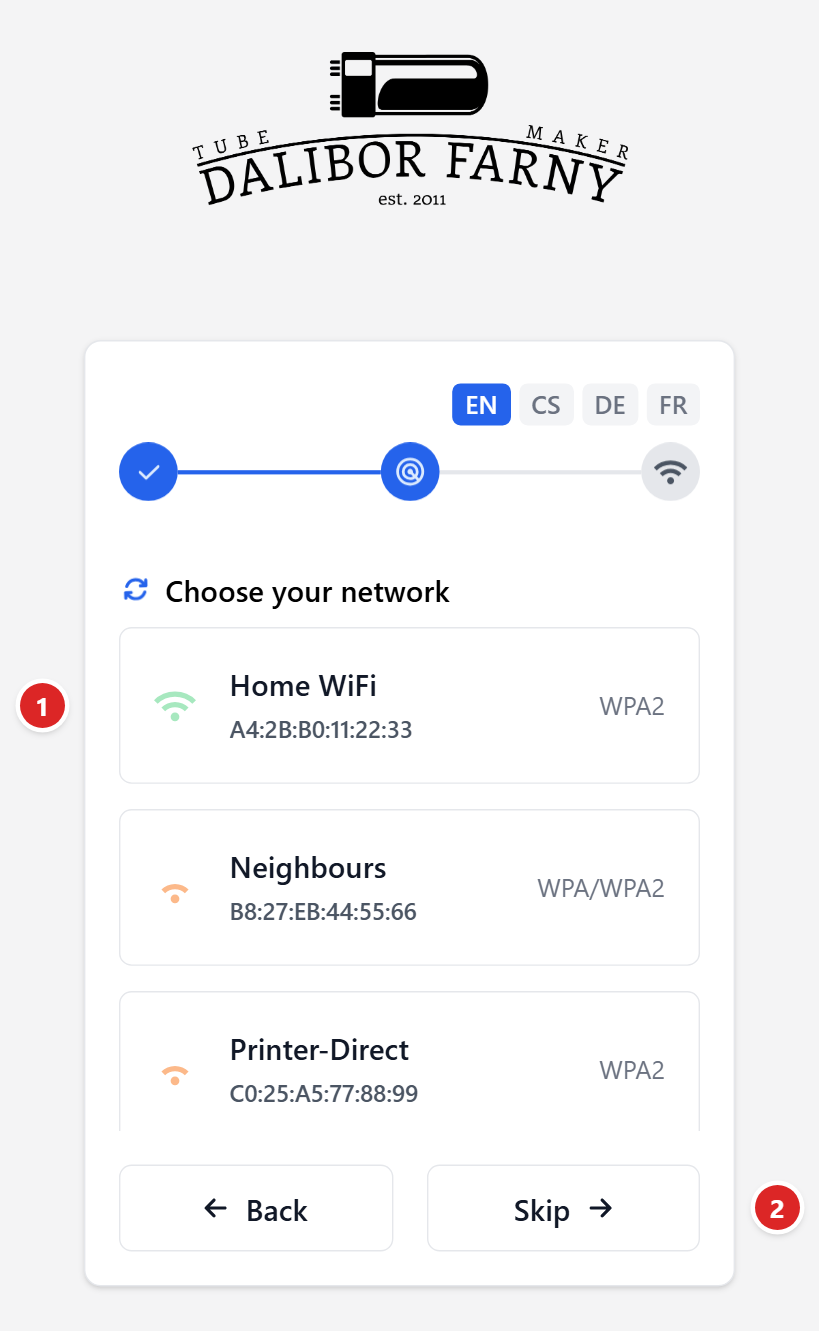
(1) Tap your home network. (2) Skip – for a hidden network that is not in the list; you type its name yourself. -
Enter the Wi-Fi password and tap Connect.
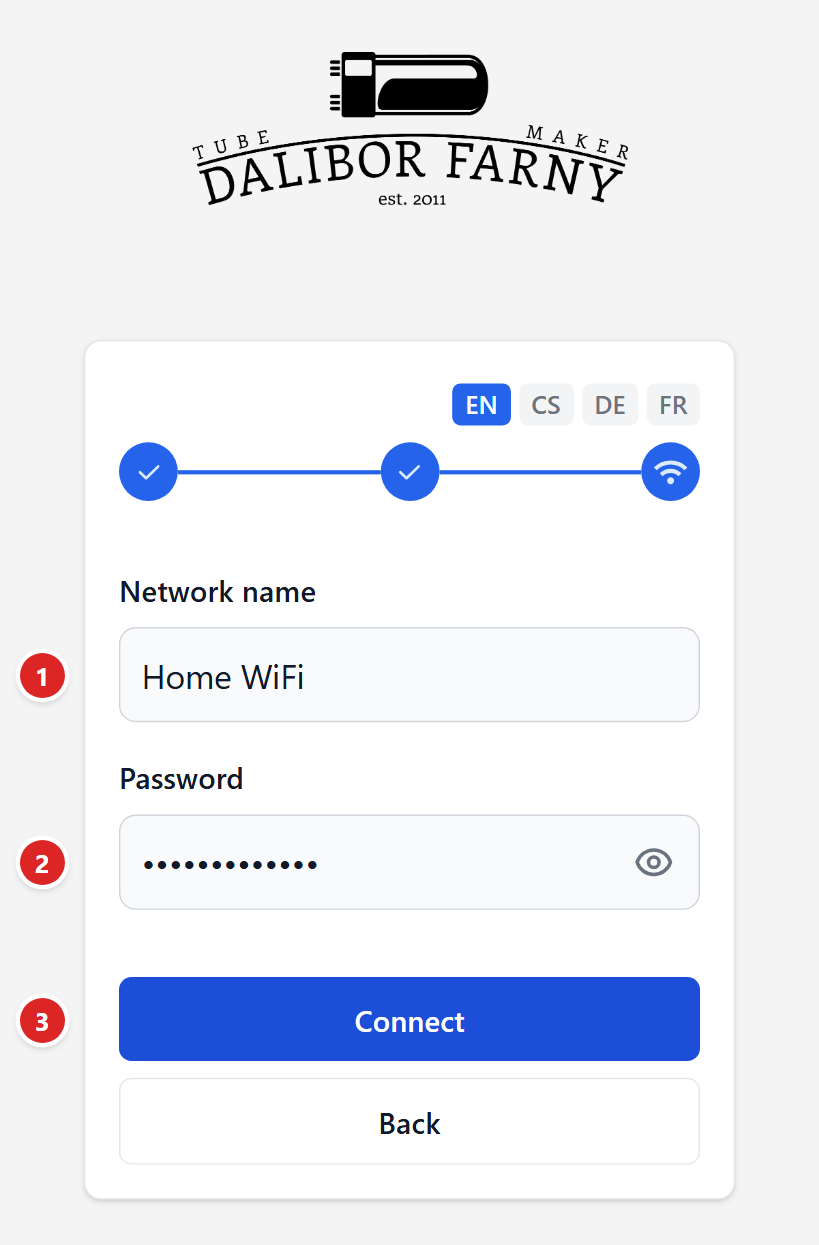
(1) Your home network. (2) The password of your home Wi-Fi – not 123456789, that one is only for the clock's setup network. (3) Connect. -
Wait a few seconds while the clock connects. When it succeeds, the page says Connected and shows the address of the clock settings, for example http://192.168.1.57 and http://puri6-42.local. The Wi-Fi LED starts breathing slowly.
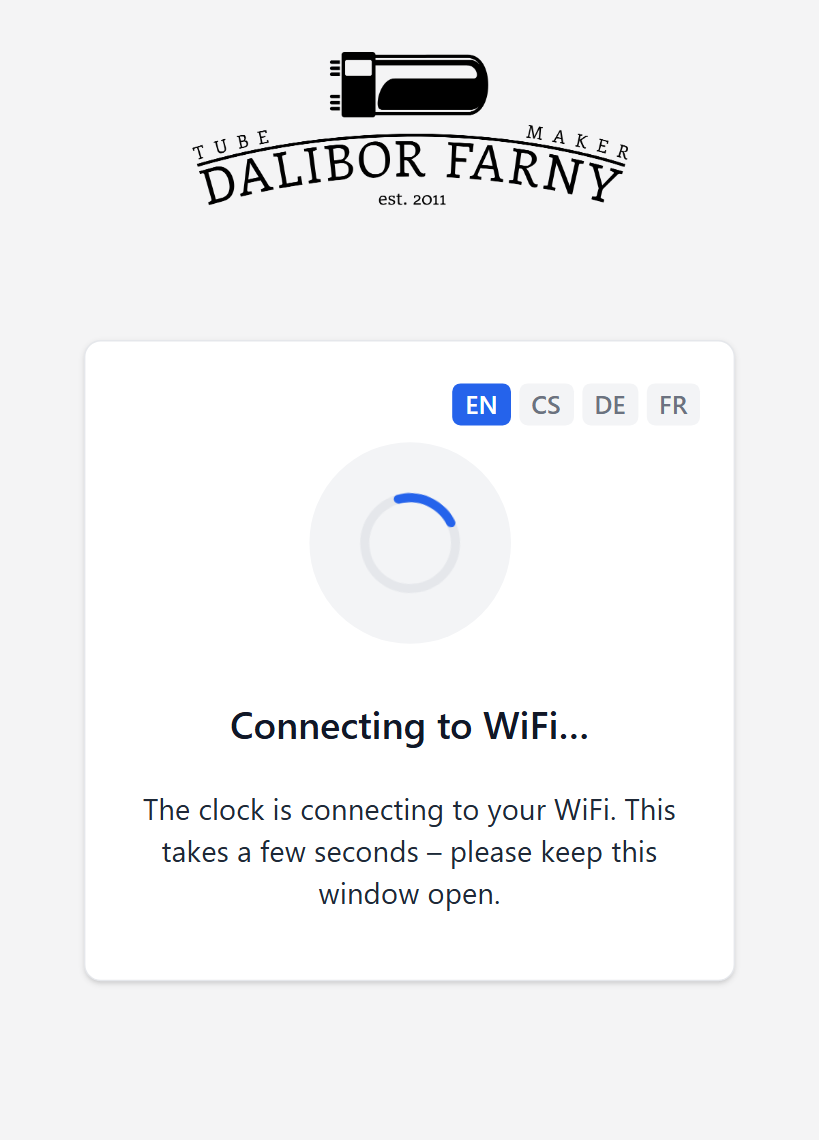
The clock is connecting to your Wi-Fi. Keep the page open. 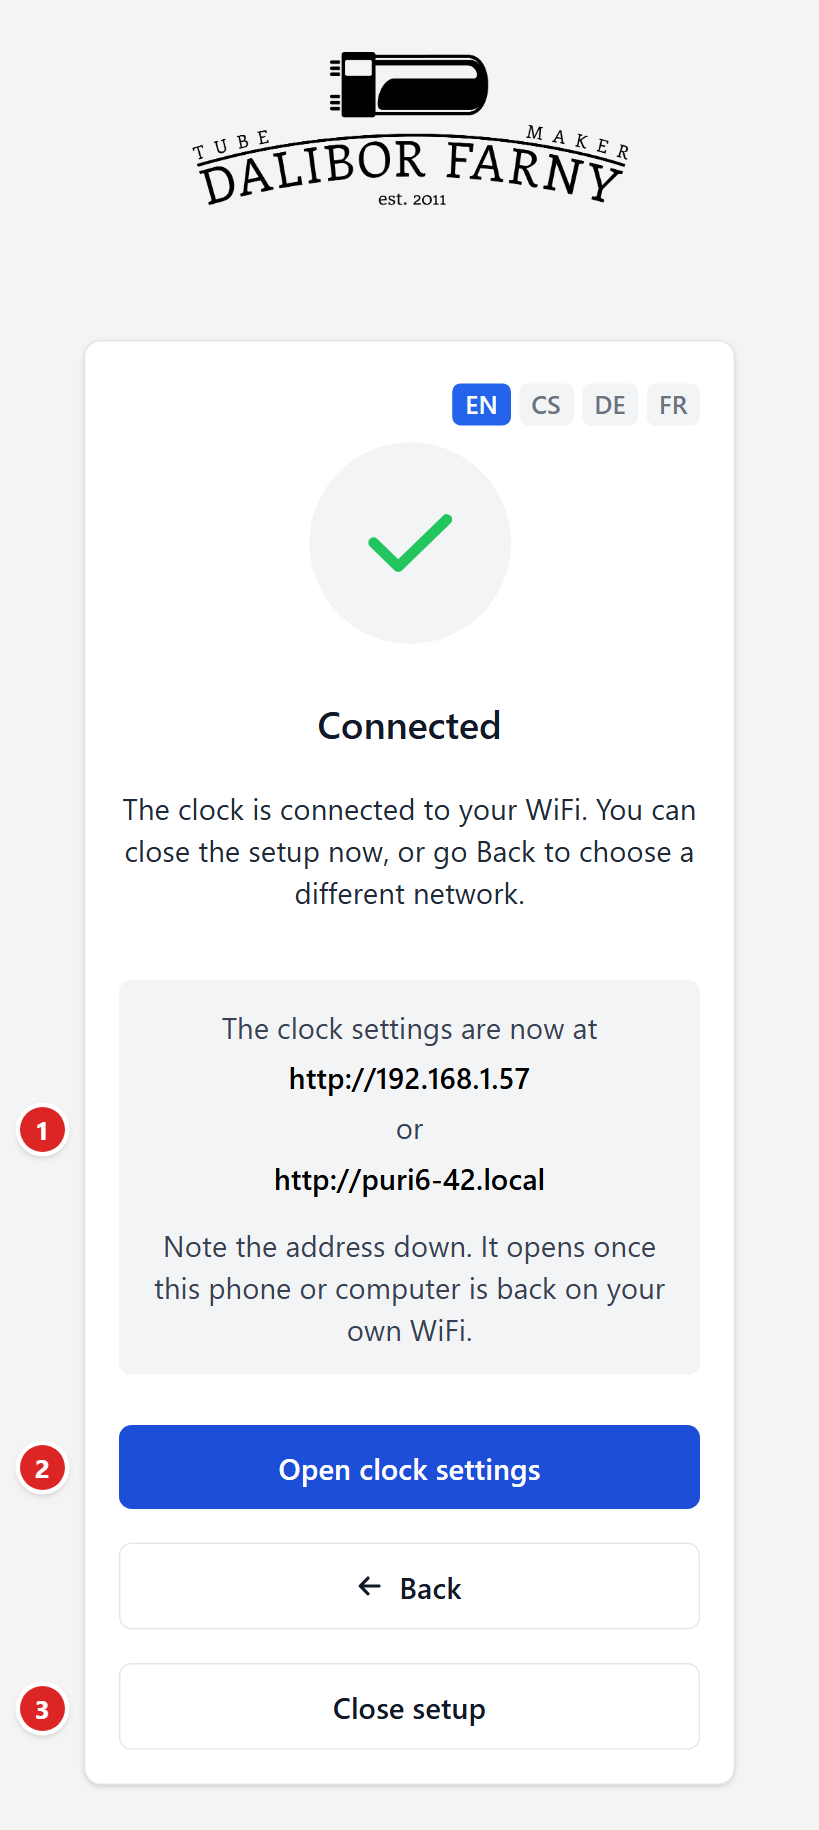
(1) The address of the clock settings – note it down. (2) Open clock settings – works once your phone is back on your home Wi-Fi. (3) Close setup – closes the clock's setup network. -
Tap Close setup. The setup network closes and your phone or computer returns to your usual Wi-Fi.
-
Tap Open clock settings. The configuration website opens in a new browser tab, where you create its password.
The page keeps showing the address, so you can bookmark it or write it down.
When you connect the clock this way, it switches on Automatic time from the internet by itself. Only set your time zone, see Date and time.
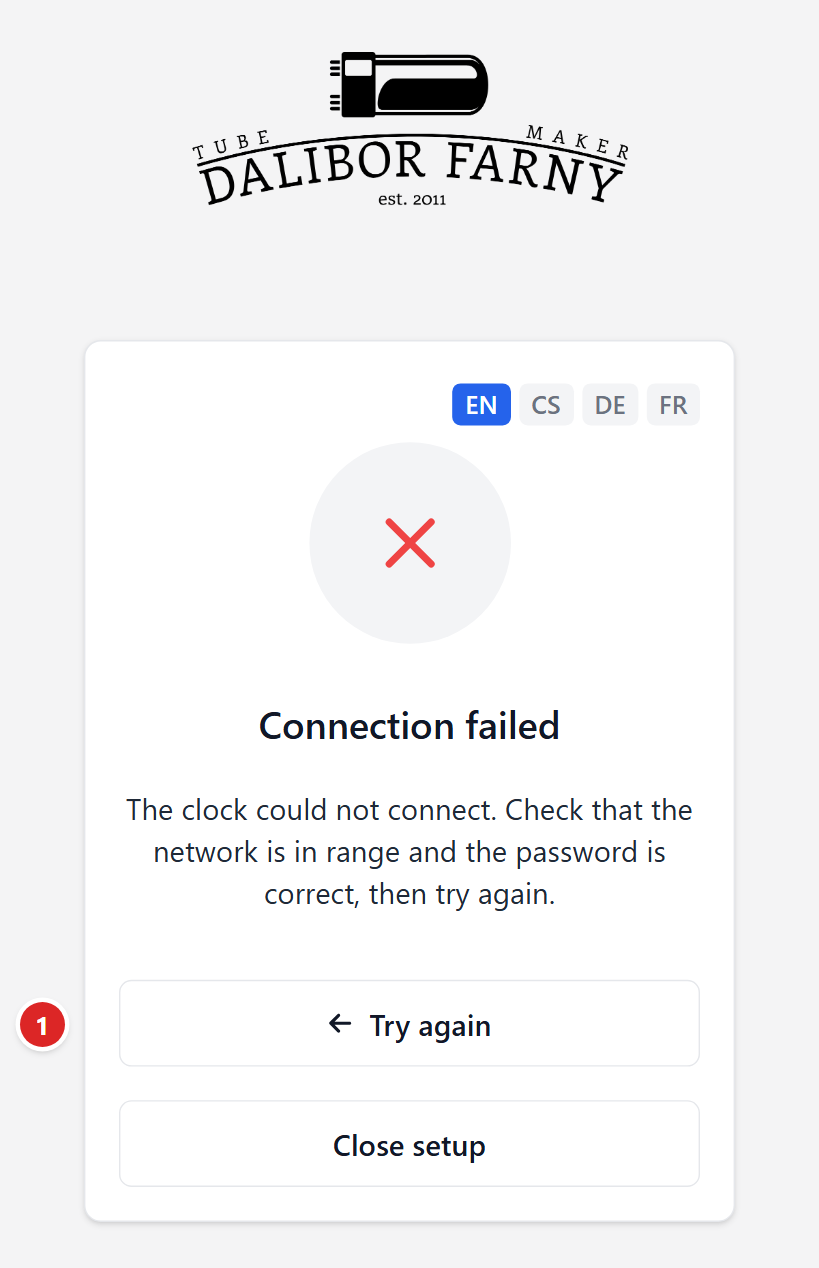
If the connection fails, the page says Connection failed or Connection timed out. Tap Try again, check the password and try again.
When the Wi-Fi is not available
When the clock cannot connect to its saved network within 30 seconds of starting (the router is off, or its name or password has changed), it opens its setup network again, so you can enter the new details. Meanwhile the Wi-Fi LED flashes twice every second.
The setup network closes after 5 minutes if no phone or computer is connected to it. With a saved network, the clock then keeps trying to reconnect to it. With no saved network, unplug the clock and plug it back in to open the setup network again.
Changing the Wi-Fi network
- Open the configuration website and go to the Network tab.
- Switch on WiFi setup portal. The clock opens its setup network again.
- Continue from step 2 of Connecting step by step.
If the clock's old network no longer exists, for example after a move, you don't need the configuration website: the clock opens the setup network by itself, see When the Wi-Fi is not available.
The clock remembers one Wi-Fi network. A newly entered network replaces the previous one.